No, did not have time to blog about the food I am cooking or about my teaching at http://livingwithphysics.blogspot.com/. Just rushing and rushing and meeting datelines one after another.
I am still not done and still extremely busy. Decided yesterday to take a short break and look through my old books and my kids' ones. There are many I have read but because of sentimental value, kept them. Do I think my kids will read them, no I guess not. Decided once and for all to take out and sell them off. Some of them are still in good condition. Got my kids to also pick out some of books they have outgrown.
Do visit my second hand book store at http://www.secondhandbooks.com.sg/life4books, if you interested in acquiring them. The link can be found at the side bar as well, will slowly upload the books when I have time.
Sunday, December 19, 2010
Sunday, September 26, 2010
Homemade Kaya
 My mother always made tonnes and tonnes of Kaya to give away to my godmother, my neighbours and her friends when I was younger. And I do miss her kaya once in a while. With kaya easily available at all bakery shops and supermarkets. It seems no sense to make my own kaya. What is however interesting to note is that when one turns and look at the ingredients list at the side of the bottles, one will find many preservatives on the list of ingredients. The thickened kaya sold at supermarkets may also contain ingredients like modified starch.
The key problem with home-made kaya is therefore, given no preservative, often do not keep more than two weeks in the fridge. I made a large batch a few years ago and as it was too much (and also too crazy) to finish it all within two weeks, I actually stopped. However, I do have a craving for homemade kaya again recently so decided to make it again. It wasn't this bad this time round, as I halved the original recipe and also gave half to my mother-in-law which made her very happy. Below are the ingredients and method for my recipe.
Ingredients:
1 bunch of pandan leaves (about 6- 8 leaves). (separate into individual leaves. For each leaf, further tie lenghwise into 3-4 strips. Then tie the bundle into a knot.)
200 ml coconut milk (You may use the ready packets found in the supermarket)
200 g of sugar (You can use brown sugar, or even substitute with 1/2 -1/3 brown, black or "orange" sugar. I used organic raw sugar for mine. It is very versatile. You can adjust sweeter or less according to taste as well.)
5 large eggs
Method:

Strain the coconut milk over the top pot of a double boiler.

Add the sugar and eggs into the pot as well.

Whisk well till the eggs, coconut milk and sugar are well-combined and the sugar has dissolved.

Once mixed, put in the knot of pandan leaves. Place the mixture over bottom of a double boiler which is boiling. Lower the flame till middle, till the water just boils with smaller bubbles.

Continue whisking the top pot till the mixture turns into a thick custard, remove the pandanus leave. The mixture may be a little lumpy, if you like it smoother, you can blend the mixture with an electric hand-held blender.
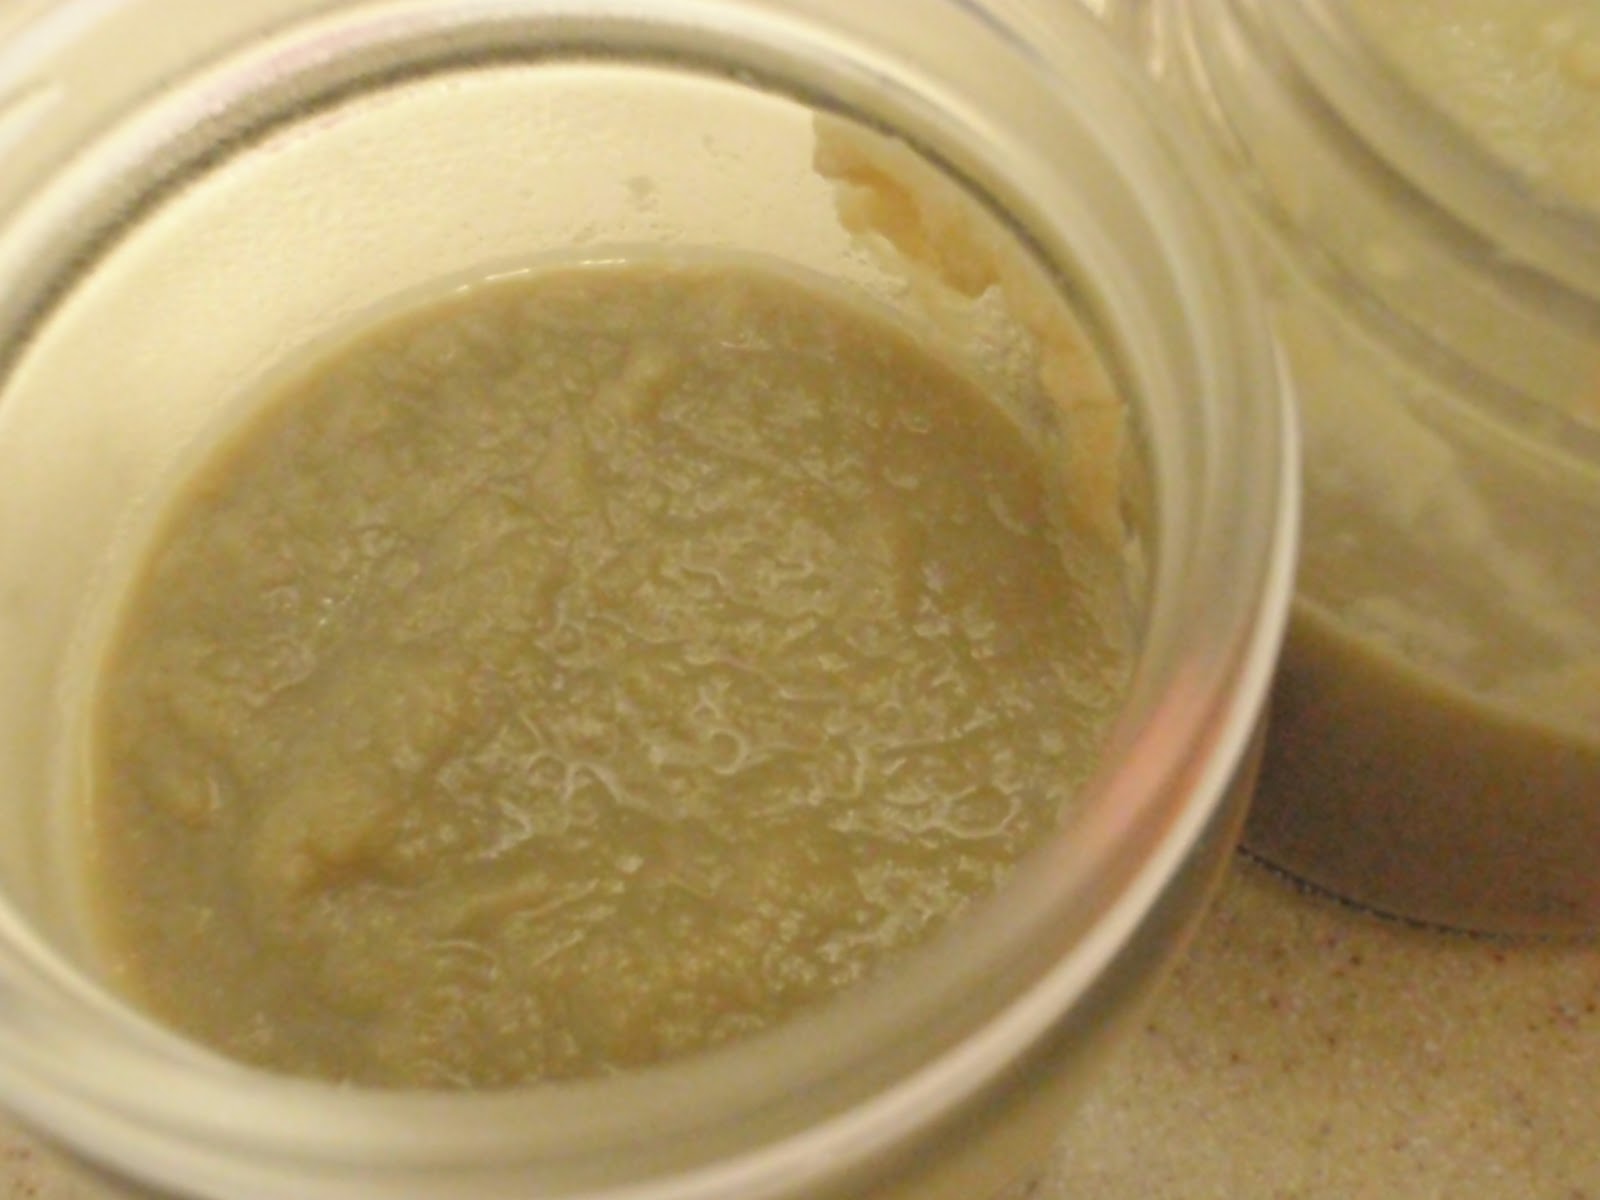 Fill into bottles that has been washed and preboiled in hot water the cooled down. You should consume all the kaya within 2 weeks.
Tuesday, September 7, 2010
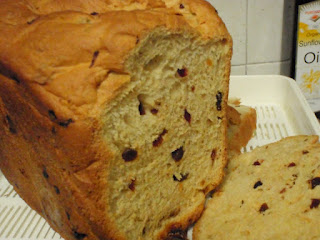
Homemade Mixed Fruit Bread
I have had my bread maker for many years and in fact it is older than my son, Daniel, who is nine this year. However, although I had enthusiastically used it in the initial years and also during the period of my chemotherapy. Work and family caught up with me and eventually it went into storage.
Recently I have been a little suspicious of the mass produced bread after my son did his mould experiment for his Science project. The bread at the supermarket lasted more than a week before it moulded while the one from the traditional bread shop lasted only about 3 to 4 days. I also had a further motivation when I found that the price of bread is steadily increasing over this one year. So I decided to take out the bread machine and start making my own bread again, not for the savings - cause if you use good ingredients, you may still end up spending more. But for the sake that I know exactly what goes into the bread.
Below is one of my recipes which I adapted from a few recipes after experimenting sometime, it differs from the ones that come with my machine as it calls for the yeast to be activated with the liquid before the rest of the ingredients gets added in. I was a little apprehensive but I realised this yielded bread that was fluffier. I also use dried organic fruits that are meant as snacks rather than those bought at bakery sections as those at the bakery sections looks suspiciously laden with sugar and colouring.
Ingredients:
1 cup of milk
2 tbsp of sugar
2 1/4 tsp of instant dry yeast
1/4 cup of melted butter
3 cups of bread flour
1 tsp of sea salt
1/2 cup of mixed fruit ( I use cranberries, raisins, chopped apricot - organic and non-sulphured)
Method:
 Put the blade of the breadmaker into the baking tin.
Warm the milk in a saucepan or a microwave till it is about 40 degrees Celsius. I usually just warm it till it is above my body temperature, I test it by dipping my finger in, it feels warmer than me and yet I can still dip my finger in. (It is like testing for fever). Dissolve the sugar and yeast and wait for 10 min. If the yeast is still active, it should bubble and foam. (You can do this in the tin or alternative in another bowl and wait for it to foam before pouring into the tin.) Once it starts to foam, you may add in the melted butter.

Combine the salt and flour and sift well. Tip in the flour mixture to the baking pan of the bread machine.

I usually add in the dried fruit on top of the flour mixture, as I usually do this before dinner, and do not want to check on the bread machine till later.
On the bread maker and set the setting to regular plain and start the cycle.

When the bread is ready (about 3 hours on my machine), remove it immediately from the baking tin and wait for it to cool before keeping and slicing it.
Extra notes:
This is a basic recipe that is easy to vary. And yes, it is that simple and I was just plain lazy.
For variations, you can replace milk with water, bread flour can be replaced by half with whole wheat flour. If you don't like the fruits, you can omit them, I put them in to increase the fruit intake of my kids. You can put in chopped nuts as well, no problem. And butter can be replaced with sunflower oil....I do that when I run out of butter, though I like butter fragrance.
Recently I have been a little suspicious of the mass produced bread after my son did his mould experiment for his Science project. The bread at the supermarket lasted more than a week before it moulded while the one from the traditional bread shop lasted only about 3 to 4 days. I also had a further motivation when I found that the price of bread is steadily increasing over this one year. So I decided to take out the bread machine and start making my own bread again, not for the savings - cause if you use good ingredients, you may still end up spending more. But for the sake that I know exactly what goes into the bread.
Below is one of my recipes which I adapted from a few recipes after experimenting sometime, it differs from the ones that come with my machine as it calls for the yeast to be activated with the liquid before the rest of the ingredients gets added in. I was a little apprehensive but I realised this yielded bread that was fluffier. I also use dried organic fruits that are meant as snacks rather than those bought at bakery sections as those at the bakery sections looks suspiciously laden with sugar and colouring.

Ingredients:
1 cup of milk
2 tbsp of sugar
2 1/4 tsp of instant dry yeast
1/4 cup of melted butter
3 cups of bread flour
1 tsp of sea salt
1/2 cup of mixed fruit ( I use cranberries, raisins, chopped apricot - organic and non-sulphured)
Method:

Warm the milk in a saucepan or a microwave till it is about 40 degrees Celsius. I usually just warm it till it is above my body temperature, I test it by dipping my finger in, it feels warmer than me and yet I can still dip my finger in. (It is like testing for fever). Dissolve the sugar and yeast and wait for 10 min. If the yeast is still active, it should bubble and foam. (You can do this in the tin or alternative in another bowl and wait for it to foam before pouring into the tin.) Once it starts to foam, you may add in the melted butter.

Combine the salt and flour and sift well. Tip in the flour mixture to the baking pan of the bread machine.

I usually add in the dried fruit on top of the flour mixture, as I usually do this before dinner, and do not want to check on the bread machine till later.
On the bread maker and set the setting to regular plain and start the cycle.

When the bread is ready (about 3 hours on my machine), remove it immediately from the baking tin and wait for it to cool before keeping and slicing it.
Extra notes:
This is a basic recipe that is easy to vary. And yes, it is that simple and I was just plain lazy.
For variations, you can replace milk with water, bread flour can be replaced by half with whole wheat flour. If you don't like the fruits, you can omit them, I put them in to increase the fruit intake of my kids. You can put in chopped nuts as well, no problem. And butter can be replaced with sunflower oil....I do that when I run out of butter, though I like butter fragrance.
Another Reason Why We Should Avoid Non-stick Cookware?
A study conducted by West Virginia University School of Medicine suggests that exposure to chemicals used to make non-stick cookware may raise blood cholesterol levels in children.
Finally there are Nitrates Free Deli Meat
One of the key changes in me when I had breast cancer was that I became more aware of what I was eating and more selective about what I ate. One of the key food which I try to stay away from are the hams, sausages. Although luncheon meat was one of my comfort food, I also limited this to sometimes once or even less a month. The key reason why I stay away from the deli meats and cured meats is that they all contain sodium nitrates which is know to be cancer causing and I do get upset nowadays, when I see more and more people eating hams and deli meats and some even touting them as health food as some hams are now lower in fat e.g. turkey ham.
Anyway, my family has been trying to avoid ham for sometime and only eat it occasionally (though I would feel guilty feeding them that). But guess what I saw at Jelita Cold Storage! Nitrates free ham!

Anyway, my family has been trying to avoid ham for sometime and only eat it occasionally (though I would feel guilty feeding them that). But guess what I saw at Jelita Cold Storage! Nitrates free ham!

And not only is it nitrates free, it is suppose to homones free and free from antibiotic as well. I bought the honey baked ham ( it cost about a little more than double of regular honey baked ham....but I think it is still affordable). I have yet to try it, but reviews from the internet seem fine. (Will update the blog again after I tried it.) Besides the honey ham, it also comes in smoke ham, chicken breast ham and turkey ham as well.
Jelita is relatively near my workplace, so I am quite happy to have found it. But yes, I do hope that with more and more people aware of the health hazards with nitrates and environmental hazards caused by mass farming, more and more people will chose deli meats that are nitrates free. Hopefully, all the Cold Storage in Singapore will eventually carry these meats and it will help bring the price down.
Sunday, September 5, 2010
Stir Fried Bittergourd with Sliced Pork in Miso Paste

The Japanese, Korean and Chinese cultural holds much similiarities due to historical reasons. So for many foodstuff found in one culture, you can almost see a similar rendition in another.
One of the favourite condiments that my mother used to enjoy using is the salted soya beans. However, with my occurence of breast cancer, my husband tends do frown when I use it as many of the version sold in the supermarkets contains preservatives and sodium benzoate which is said to be carcinogenic. I have however found that the Japanese miso has a similar taste to the salted soya beans and have since replaced that in many of the dishes I used to cook with salted soya beans.
Miso is fermented soya beans that is said to contains live cultures which are supposed to be good for the digestive system and helps in detoxification. It is also zinc, copper, potassium and lecithin which are thought not only to promote the immunity system but also aid in prevention of breast cancer, and hence my husband do not object too much of it when I use it in cooking. But it is also to be noted that miso is salty and hence high in sodium, however one is also unlikely to use too much of it because of its saltiness.
This dish presented here is one of the renditions of the dishes my mother used to cook but with miso instead.
Recipe:
 1 bittergourd. Sliced lengthwise and then cut into smaller segments (left). Sprinkle with a teaspoon of sugar and salt. Mix well, and set aside for 30 min. The sugar and salt draws out the bitter juices. Just before cooking, squeeze the bittergrourd with hands, and rinse under the running tap to remove the sugar and salt. Drizzle with the juice from one small knob of ginger that has been grated.
1-2 stalks of chilli (de-seeded and chopped finely)
3-4 cloves of garlic (chopped finely)
100 g of collar pork (sliced thinly). Marinate with a little pepper and light soya sauce.
2 tsp of miso mixed in a little warm water.
sunflower oil
Method:
1. Heat the wok, drizzle in sunflower oil, and stirfry the garlic and chilli till fragrant.
2. Add in the sliced collar pork and fry till it is almost cooked. Then add in the bittergourd and stir-fry well. The wok should be relatively dry.
3. Add in the miso paste that has be softened with a little warm water. Off the flame and fry the mixture well. The miso should not be overcooked as it said that it will kill the cultures in the miso. Once, mixed well, the dish is ready for serving.
This is one of my favourite dish I like to use in my lunch bento as it is not too saucy and yet flavourful.
Wednesday, September 1, 2010
Food of Yesterdays that Can No Longer Be Found in Singapore
There has been a series of documentaries recently (both English and Mandarin) on Singapore in the yesteryears and I cannot help but recall the food that I use do have which I can no longer have in Singapore. Some of my younger friends think that I am particular with food, and I confess, yes I am. I don't need to have expensive food or dine at restaurants, but I need to have food that quality as it was when I was younger. I don't like food court food, as they have been mass produced, and somehow I cannot taste the "heart" placed in preparing the food, the food simply screams to me " I am more interested in earning your money" than "please appreciate the food I have cooked for you." I know I am a little harsh and a little unfair, but I simply cannot help myself and so I rather not eat them and go hungry and stick with instant noodles if I cannot find what I like. My sister-in-law will attribute that to my Melancholic nature.
Today, feeling a little nostalgic, I decided to list down some of the things that I used to missed.
(1) My grandmother used to live at Kampong Bahru and whenever we visit on weekends, we will pass by Chinatown (Telok Ayer) to change bus. As my grandmother was a thrifty women, we tend to avoid having dinner at her place. So we will first have early dinner at Telok Ayer. The makeshift stalls then were all lined along the streets. So when you sit at the table, the cars, motorbikes would drive in the narrow street beside you. My father will always order ngoh hiang (five-spices roll) with fried beancurd and braised squid with all of us to have. Though there are still ngoh hiang stalls in Singapore, they never do taste the same and you will never have the makeshift stalls again.
(2) My elder brother was asthmatic, so there were many occasions which he was hospitalised. On those occasions, my father would fetch me from school (instead of me taking the school bus) and then bring me to visit him, as my school was at Victoria Street (the current Chjimes) and my brother was hospitalised at General Hospital. My father and I will then have dinner at the makeshift stalls at Telok Ayer. His favourite would be the fish head noodle. He would order a bowl and we would share. The fish head noodle then was cooked on a flaming wok where the cook would toss the contents and you could see big flames and large tongues of fire. I guess this was the cause of the "wok hei" taste. Though I must confess, the bowls were not very clean and the soup had remnants black specks which I think came from the wok, but nevertheless it was still one of the food I enjoyed and never had food poisoning eating it.
(3) My grandmother was a true blue Hakka and had many dishes that she kept to her heart and never did pass down to anyone, even her daughters. Though my mother managed to learn the "abacus seeds" by secretly observing her, there were still certain dishes I wished she could have taught someone. (If anyone can teach me....I will be most willing). One was preserved vegetables (客家梅菜). The preserved vegetable my mother taught and cooked is never the same as my grandmother's as it seemed more teochew. Those sold outside at Hakka restaurants also never came close. Hers was alot drier, chewier, sweeter and yet more flavourful. You needed only a little to go with a whole bowl of rice.
(4) (Continued from 3) The other dish is not strictly a dish, it is used as an acompliment for my grandparents when they drank stout. It is dried slivers of liver (not sure if it was pork or chicken, my mum said it was chicken) that had been heavily salted and spiced. That is definitely lost as I have never seen it again.
(5) The last one that I truly miss is not a dish, but a fruit. Till Primary Six, my other grandmother had lived in Geyland in a raised wooden house that was supposedly built by my grandfather when he first came here. They used to own a backyard which had all kinds of fruit trees. They especially had many guava trees. The local guava were so different from the ones sold in the markets now. Singapore seems only to have Thai variety guava now. The then local guava when fully grown were only slightly smaller than the size of a clenched fist, or tennis ball. When ripe was very soft in the centre and extremely sweet. Some had pink centres and those were even sweeter. The seeds could be eaten as well and need not be removed. Whenever I visit, I was sure to get a big bag of guava back, I can eat two to three in one sitting. Oh, in those times, we didn't even eat it with plum powder. I have tried looking for the local guava (which my mom calls "bak gia") in the fruit stalls or markets and have never seen them again.
(6) I first stayed in Toa Payoh till age of three before shifting to Ang Mo Kio. My elder brother 4 years my senior, was often tasked with looking after me and boy was I clingy. I simply adored him when I was younger and would follow him wherever he went and would cry when he was not to be seen, even when he was in school. My mother therefore made him bring me wherever he went....he must have found me a nuisance, but he would still bring me as my mum would give him a little more pocket money if he brings me along. I don't know why, cause people tell me they cannot remember stuff before three years of age, but I do remember some snapshots of events that happened to me before 3. For example, I remember my brother bringing me to play marbles at the field with the neighbours. I did not really enjoy watching him but would wait for him patiently, as after the game. The boys would all go to one of the units at a particular flat to buy icesticks in plastic (which they call Sng Pow - 冰包 in Hokkien). There were all sorts of flavours, all without colouring and preservatives as they were homemade, pineapple flavour with pineapple bits, green bean soup, red bean soup, dried longan, sour plum. These again, are never seen, for these family hawkers have disappeared.
So, was I fortunate to have lived through these times? Or are we unfortunate cause we have lost part of our history?
Sunday, August 29, 2010
Homemade Ice Cream : Strawberry Ice Cream
I was in the mood for buying fruits last week and when I saw the rows and rows of fresh fruit at the supermarket aisle, I could not resist myself, and bought 2 boxes of organic strawberries, 2 large mangoes and a box of organic golden kiwi . But to my horror, I was so busy last week that I entirely forgot about them. When I discovered them again on Thursday, some was turning mushy. I threw away those mushy ones and macerated the remaining and decided to make ice cream with them.
Homemade Strawberry Ice Cream
Those who know me, knows that I am not so great a fan on strawberry ice-cream, or in fact any that taste like strawberry milk. I prefer the fresh clean taste of fresh strawberries. But my daughter begged and begged and I decided to make ice cream instead of sorbet. However, after it was made and I tasted it the second day, I realised it did not taste so bad as store bought strawberry ice-cream, in fact the chips of strawberries made it rather refreshing and so I just went on spoon after spoon on the scoop of ice cream which I insisted my husband taste for me.
The ice cream below was made over the period of 2 days. 3 days infact as I left it overnight on the second day for the churned ice cream to harden till store bought texture and my daughter was asking over and over and over again when she can have it. So you do need a little bit of planning if you intend to make this ice cream.
 [Recipe Adapted from Making Artisan Gelato by Torrance Kopfer
 ]
]
Ingredients:
Strawberries Puree:
~400 g of strawberries
1 1/2 tbsp of sugar
1 tbsp of lemon juice
Strawberry Add in:
~200g of strawberries
3 tbsp of sugar
Ice Cream Base:
400 ml of fresh cream
350 ml of milk
120 g of castor sugar
2 egg yolks
Method:
First Day:
1. Making the Strawberry puree. Hull the strawberries for making strawberry puree. Cut them in halve. Add in sugar and lemon juice and toss well. Store them in refrigerator in an air tight container overnight. Puree the strawberry the next day (discard the juice that has been drawn out) in a blender till smooth.
2. Macerate the strawberry add-ins. Hull the strawberries. Cut into small bite size. Add in the suger, toss well and store them in another air-tight container overnight.
2nd Day:
3. On the second day. Heat the milk about 100 ml of the cream in the saucepan, together with the 1/2 the sugar on a stovetop over low flame. Stir constantly till the sugar has dissolved. When the milk has just bubbled, remove from stove top.
4. In a large bowl, break in the 2 large egg yolks, and remaining sugar. Whisk till the mixture foams and lighten.
5. Temper the eggs by slowly ladelling the 1/2 the amount of warm milk into the whisked eggs while whisking at the same time. Pour this mixture back into the warm milk saucepan.
6. Return the mixture back onto the stove at low flame. Heat the mixture while constantly stirring with a wooden spatula and scrapping the bottom of the pan till the mixture thickens and start coating the back of the spatular. Then remove the pot from the flame.
7. In a large bowl place ice, salt and water. Put another smaller mixing bowl (but must be able to still accommodate and mix) into the ice mixture. Pour the remaining cream into the mixing bowl and the cooked custard in (6) into the mixing bowl. Whisk till the mixture is well mixed and cooled down. Put the mixture into the refrigerator for at least about 4 hours.
8. Churn the mixture in 7 in the ice cream maker . When ready, transfer the ice cream into a plastic tub, stir in the strawberry mix-ins and freeze till storebought hardness.
Homemade Strawberry Ice Cream
Those who know me, knows that I am not so great a fan on strawberry ice-cream, or in fact any that taste like strawberry milk. I prefer the fresh clean taste of fresh strawberries. But my daughter begged and begged and I decided to make ice cream instead of sorbet. However, after it was made and I tasted it the second day, I realised it did not taste so bad as store bought strawberry ice-cream, in fact the chips of strawberries made it rather refreshing and so I just went on spoon after spoon on the scoop of ice cream which I insisted my husband taste for me.
The ice cream below was made over the period of 2 days. 3 days infact as I left it overnight on the second day for the churned ice cream to harden till store bought texture and my daughter was asking over and over and over again when she can have it. So you do need a little bit of planning if you intend to make this ice cream.

Ingredients:
Strawberries Puree:
~400 g of strawberries
1 1/2 tbsp of sugar
1 tbsp of lemon juice
Strawberry Add in:
~200g of strawberries
3 tbsp of sugar
Ice Cream Base:
400 ml of fresh cream
350 ml of milk
120 g of castor sugar
2 egg yolks
Method:
First Day:
1. Making the Strawberry puree. Hull the strawberries for making strawberry puree. Cut them in halve. Add in sugar and lemon juice and toss well. Store them in refrigerator in an air tight container overnight. Puree the strawberry the next day (discard the juice that has been drawn out) in a blender till smooth.
2. Macerate the strawberry add-ins. Hull the strawberries. Cut into small bite size. Add in the suger, toss well and store them in another air-tight container overnight.
2nd Day:
3. On the second day. Heat the milk about 100 ml of the cream in the saucepan, together with the 1/2 the sugar on a stovetop over low flame. Stir constantly till the sugar has dissolved. When the milk has just bubbled, remove from stove top.
4. In a large bowl, break in the 2 large egg yolks, and remaining sugar. Whisk till the mixture foams and lighten.
5. Temper the eggs by slowly ladelling the 1/2 the amount of warm milk into the whisked eggs while whisking at the same time. Pour this mixture back into the warm milk saucepan.
6. Return the mixture back onto the stove at low flame. Heat the mixture while constantly stirring with a wooden spatula and scrapping the bottom of the pan till the mixture thickens and start coating the back of the spatular. Then remove the pot from the flame.
7. In a large bowl place ice, salt and water. Put another smaller mixing bowl (but must be able to still accommodate and mix) into the ice mixture. Pour the remaining cream into the mixing bowl and the cooked custard in (6) into the mixing bowl. Whisk till the mixture is well mixed and cooled down. Put the mixture into the refrigerator for at least about 4 hours.
8. Churn the mixture in 7 in the ice cream maker . When ready, transfer the ice cream into a plastic tub, stir in the strawberry mix-ins and freeze till storebought hardness.
Cheong Fan with a Japanese Twist (日式肠粉)
The favourite breakfast for my daughter, Danielle, must the Chee Cheong Fun (Steamed Rice Roll). The Chee Cheong Fun must have originated from the Cantonese, as one can surely find them in any restaurants or shops selling Dim Sum (点心).
The cheong fun served in Singapore at the normal shops that sells breakfast are usually simpler in style than those served in the dim sum restaurants (which contains stuffings of shrimp or char siew - a sweet roast pork). These cheong fun are usually steamed and cut into pieces, drizzled with a little fried shallot oil and sweet sauce (and chilli sauce if required) and sprinkled with sesame seeds. When I was younger, each rice roll was only 30 cents and I would only need about amost 1 1/2 to fill my stomach (my elder brother would always be glad to finish the rest for me). But the price has slowly crept up over the years, and how each roll can cost as much as $1.00 at some shops.
(1) rice rolls are easily available at most of the beancurd stalls at wet markets from $2.20 to $2.60 for a packet of 10 rolls.
(2) My daughter and son actually do not like sweet sauce, so they usually have their cheong fun with a drizzle of sesame oil and light soya sauce.
So I usually prefer to buy my own and steam it in the morning for them as breakfast.
Recently, I found that I had a bottle of Japanese Goma sauce (sesame dip) which I left over from my last steamboat meal. (I like to dip it with sliced beef). Somehow, I decided to add it my cheong fun....and boy did I really like it. My kids still like theirs plain and cannot appreciate the Goma sauce, but my husband loves it as well. You should really try it the next time you have your cheong fun.

Recipe:
 1 bottle of Goma Sauce
Light soya sauce
Sesame oil
2 rolls of rice rolls (cheong fun) - This is for each person. This can be bought at most beancurd stalls. For those living abroad, they are readily available at stalls carrying Asian or Vietnamese food.
Sesame seed (toasted in a frying pan till fragrant but not charred)
Method:
1. Steam the rice rolls over a wok of water for about 10 min to warm it up.
2. Transfer the rice rolls to a serving plate. Cut the rice rolls with a scissors into bite size length or quarters. (I like mine quartered, my daughter likes hers bitesize.)
3. Drizzle sesame oil over. Then drizzle light soya sauce to taste. Finally drizzle in the Goma Sauce over.
4. Sprinkle with the toasted sesame seed. (As much as you like!) And it is ready for serving.
This is especially an easy breakfast, I usually steam the rice rolls while brushing my teeth and assemble them after that.
Friday, August 20, 2010
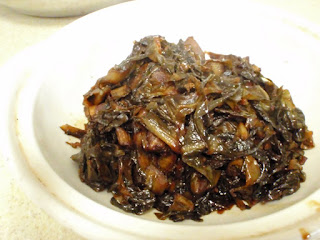
Preserved Vegetables with Duck (梅菜鸭)
This is another comfort dish for me. Coming from a family that was not extremely rich, my mother would think of innovative ways to cook leftovers so that they would not go to waste. During festivities, we would often have a whole duck, either roasted or braised. However, as there was a significant portion of the duck that was bony, there would often be leftovers of pieces of duck with lots of bones and little meat attached to it. One of the favourite dishes that my mum would cook for us the next day would be the preserved vegetable with the leftover duck. Usually, she would do a large enough portion that it can be eaten over three days, as the taste is usually best after the second day.
Now, although I am better to do, I still cook this dish whenever we have roast duck when we eat out. I would request for whatever is left, if there is any, to be packed back for me to make the dish the next day. Though not very nutritious, I found that the preserved vegetables fibrous and would often encourage bowel movements the next day.
The secret to the complexity in taste for the dish which my mother swears by is to use a mixture of both the salted and sweet preserved mixture. This is a great dish with steaming rice and also Teochew porridge, though it is more a Hakka dish.
 Wash the preserved vegetables well especially between the stems at the ends close to the roots to remove the excess salt and grime. Soak the bundles of preserved vegetables in water and change the water a few times in a large basin, till the water becomes clear.
Drain the water from the soaked preserved vegetables. Squeeze the excess water with your hands. Cut the vegetables into bite size (approx. 0.5 cm in length). Discard the ends which are more fibrous and difficult to cut through. Place the cut vegetables in a strainer to wash over running water. Squeeze the excess water from the cut preserved vegetables and set aside.

Flatten the segments of garlic with the back of a cleaver. Remove excess skin that comes off if necessary.
There is little to prepare for the duck, just pick out the smaller pieces of bone if there are any.
 Heat the wok with the oil and stir fry the garlic till fragrant.
 Add in the roasted duck into the wok mix well.
Add in the cut preserved vegetables and mix well. Drizzle in the dark soya sauce and sprinkle in a pinch of sea salt. Also add about 1 tbsp of sugar in. Mix well.
Add water into the mixture till it covers about ¾ of depth of the mixture. Mix well and let it boil, then lower the flame.
Cover the wok and let the mixture cook about 30 min over low flame. Alternatively, you can transfer the mixture to a slow cooker to let it cook for at least 4 hours.
Serve on a serving dish when the dish is ready. The dish can be eaten over three days. Just remember to heat the mixture every night and also heat it up before every meal. (The mixture should be heated till it is bubbly hot and maintained at that for at least 3 minutes.)
Note: You can do the same dish, if you have leftover roast or braised pork. Or if you simply have craving for the dish, which I occasionally do, I just use belly pork cut to about 1/2 inch thick to substitute the leftover pork or duck.
Now, although I am better to do, I still cook this dish whenever we have roast duck when we eat out. I would request for whatever is left, if there is any, to be packed back for me to make the dish the next day. Though not very nutritious, I found that the preserved vegetables fibrous and would often encourage bowel movements the next day.
The secret to the complexity in taste for the dish which my mother swears by is to use a mixture of both the salted and sweet preserved mixture. This is a great dish with steaming rice and also Teochew porridge, though it is more a Hakka dish.

Recipe:
1 portion of leftovers from 1 roast or braised duck (usually comes up to about ¼ or a duck)
300 g of salted preserved vegetable (咸梅菜)
300 g of sweet preserved vegetable (甜梅菜)
1 whole clove of garlic (about 8 segments)
1 tbsp of (sunflower) cooking oil
2 tbsp of dark soya sauce
1 pinch of sea salt (optional)
1 tbsp of sugar
water
Method:

Drain the water from the soaked preserved vegetables. Squeeze the excess water with your hands. Cut the vegetables into bite size (approx. 0.5 cm in length). Discard the ends which are more fibrous and difficult to cut through. Place the cut vegetables in a strainer to wash over running water. Squeeze the excess water from the cut preserved vegetables and set aside.

Flatten the segments of garlic with the back of a cleaver. Remove excess skin that comes off if necessary.
There is little to prepare for the duck, just pick out the smaller pieces of bone if there are any.


Add in the cut preserved vegetables and mix well. Drizzle in the dark soya sauce and sprinkle in a pinch of sea salt. Also add about 1 tbsp of sugar in. Mix well.
Add water into the mixture till it covers about ¾ of depth of the mixture. Mix well and let it boil, then lower the flame.
Cover the wok and let the mixture cook about 30 min over low flame. Alternatively, you can transfer the mixture to a slow cooker to let it cook for at least 4 hours.
Serve on a serving dish when the dish is ready. The dish can be eaten over three days. Just remember to heat the mixture every night and also heat it up before every meal. (The mixture should be heated till it is bubbly hot and maintained at that for at least 3 minutes.)
Note: You can do the same dish, if you have leftover roast or braised pork. Or if you simply have craving for the dish, which I occasionally do, I just use belly pork cut to about 1/2 inch thick to substitute the leftover pork or duck.
Thursday, August 19, 2010
Robinson's Card Members Sale (19th August 2010 - 22nd August)
Just received the Robinson's mailer for the latest sale. Two interesting gadgets I would like for my kitchen if I already did not have it.

But this is so cute! And as with Saeco Go, it is fully automatic and suitable for the family. I saw this model last year on the web, but it was not available in Singapore yet, so I could not wait. This one is more aesthetically appealing and still has the functionality and quality as all typical Saeco machines. It is originally retailing for SGD$1000 + but if you are a card member, it now only cost SGD$788, definitely a steal.....
Oh it is only available at Centrepoint Robinsons.
Oh it is only available at Centrepoint Robinsons.

Second is the Cuisinart Hand held blender  with chopper attachment
 . I think that is going for SGD $138 for cardmembers. This is a little expensive, but a hand held blender is usful when you want to make good thick soups, or for baby food when they are weaning.
Tuesday, August 17, 2010
Food Inc : What on Earth are We Really Eating...
![Food, Inc. [Blu-ray]](http://ws.amazon.com/widgets/q?MarketPlace=US&ServiceVersion=20070822&ID=AsinImage&WS=1&Format=_SL160_&ASIN=B002LBKDYE&tag=liviwithphysf-20)
Knowing my passion for documentaries and food, my husband brought home the "Food inc." for me to watch. After watching this, it really sets me thinking. In our bid to make food readily available for the masses, we have ended up not only being able to feed the masses but also make the general population more obese.
At least, in Australia and US, people are aware of the problem. In Singapore, where we still have an older generation which is not very educated, people are often not even aware of the problem. We in fact readily jump to buy food that that "corn-fed" thinking that they are the healthier options. In reality, corn-fed cows are the ones with the most problems. We import much of our food source from other countries, and to feed our population of 6 million, we source our food from "efficient" farms over the world. In reality, are our food really safe? If we also look our own lifestyles and how we are eating and spending, are we overspending, overeating what is necessary? Look at the food on the store shelves of the supermarket, turn over the read the labels carefully, how many of the ingredients do we really recognise.
This is really a compelling movie / documentary to watch, it really gives us better insights to what is happening to the food industry around the world.
You can get the full documentary in Youtube, just google for it. The videos of Part I, II and III from youtube can also be viewed below.
Friday, August 6, 2010
Ice Cream Maker is Finally Here!
After much consideration, I finally got my Cuisinart Icecream Maker.....going to the supermarket to get the ingredients to try out new ice cream! Will stick to basics...but can't wait to make my favourite matcha and sesame ice cream.
Now is to go to Amazon to get a few receipe books on ice cream as well.
I am so happy......
Sunday, August 1, 2010
Home-style Chilli Crab
 |
| Chilli Crab While waiting for Daniel to finish his piano lesson, we went walking around at the supermarket when we found that the mud crabs were on sale for SGD$6.88 for two pieces. Since I also had some left over chilli when I last made hainanese chicken rice, we decided to get 6 crabs to make chilli crabs. Below is my version of the chilli crab which both my family and I enjoy. Homestyle Chilli Crab Serving Size : 6 4 - 6 mud crabs 3 -4 tbsp of home-made garlic-ginger-chilli mix 1 thumbsize knob of ginger 1 bowl of ketchup ½ tsp of sea salt 1 tsp of dark soya sauce 1 tsp of sugar (optional) 1-2 eggs Water Sunflower cooking oil Method:   Chop the ginger up finely. There is already ginger in the chilli mix, but I prefer to also have chopped ginger, as well as it provides for different textures in taste.  Heat the wok, drizzle in a little sunflower cooking oil and stir fry the chopped ginger and chilli mix till fragrant.  Add in the crabs and sea salt and mix well.  Pour water till the heating mixture above till it half covers the crabs, add in the ketchup, dark soya sauce, and sugar and mix well. Cover the wok and let it simmer till the crabs are cooked and the shells have turned red. Remove the crab pieces till the serving plate while keeping the sauce simmering in the wok.  In a small bowl crack the eggs and beat them with a chopstick. Drizzle the egg mixture in the simmering sauce, wait for a second or two before mixing it.  Drizzle the crab with the sauce and serve it with rice. The crabs also go nice with baguette or steamed or fried buns (mantou). Home-made garlic-ginger-chilli mix : 8-10 stalks of Fresh Red Chillies 8-15 stalks of fresh small thai red chillies (optional as this increases the spiciness, you can substitute with the same amount of the fresh red chillies) Sufficient garlic to make up half the amount of chilli Young ginger, sufficient amount for about same amount of chilli Put all the ingredients in the chopper and chop finely. If using for hainanese chicken rice chilli dip, you can scoop about 1-2 tsp into a saucer, squeeze lime and put a dizzle of light soya sauce over in the sauce, mix well and serve. Leftovers can be freezed (preferably using ice cube makers) and used later. I usually keep the chilli not more than 6 months in the freezer. *Note: The quality of the mud crabs vary with respect to the mating season. But on the whole, in choosing mud crabs, you should get the active ones. Turn the mud crab over and press on the underside, the crab shell should be hard and not yield to pressure. Most of the mud crabs sold at the supermarkets are the male ones, if you like the roe of the female ones, then you need to buy the mud crabs from stalls specializing in crabs from the wet markets in Singapore. The mud crabs should also be slaughtered just before cooking as the meat deteoriates very quickly after it is killed. One trick that my family always does in easing the killing of the crabs is to put the crab into the freezer about 30 min before the slaughter, this will help to immobilize the crabs a little. But you still need to be very careful when slaughtering the crabs as they will regain consciousness very quickly. |
Sunday, July 4, 2010
Braised Pig's Trotters - the Easy Way with Slow cooker
 My son insisted that I must add this to my blog so that his wife knows how to cook this....so this is how it goes. Occasionally when I go to the wet market, or when they crave for it, I will cook it for them. I also like this dish because it is very easy to cook using the slow cooker, you literally throw in everything and let it simmer. So occasionally I will cook over the night for lunch. The way that it is prepared here requires no extra oil-you will get it from the trotters itself. It is not the traditional method, but it tastes just as good (my husband says that he can't tell the difference between this and the famous stall that we usually patronise at Ang Mo Kio, so I guess it is true. The sauce itself can be boiled and stored overnight, and you can add in hard-boil eggs, beancurd, even chicken wings for a second meal! If you like, you can also add in intestines - my mum used to put in pig's tongues and lungs as well - though lungs are no longer available in Singapore.
In traditional Chinese family, the sauce boiled and kept in a pot sealed with wax paper after use and kept in a cool dry place (there were no refrigeration then) to reserve for the next use. When there is insufficient sauce, a new batch is cooked up and added to the old sauce. So essentially, the sauce can be hundreds of years and it gets passed down generations after generations. Flavors of the previous braised meats enhances the sauce and adds to the complexity. So here is the recipe.
Serving Size : 4 - 6
Preparation Time (not including cooking and soaking of mushrooms) : 10 - 15 min
Cooking Time: About 6 hours on Auto for the slow cooker.
Serving Size : 4 - 6
Preparation Time (not including cooking and soaking of mushrooms) : 10 - 15 min
Cooking Time: About 6 hours on Auto for the slow cooker.
Ingredients:
 6 - 10 Dried Shitake Mushroom. You can soak it in water in the fridge overnight / or whole day - when I know I am cooking this dish in the evening. Or you can soak in hot boiling water for an hour to soften. You cannot substitute with fresh shitake as it does not taste right. Wash the mushroom first before soaking so that you can reserve the water which the Japanese says it is full of "unami". Snip off the stalks after it has soften. You can add the stalk and liquid to the braise to enhance the flavour. I don't usually eat the stalks.
 1 -2 Whole Pig Trotter : I usually get this at the wet markets, but occasionally I also get it at the supermarkets. Get the butcher to chop up into big chunks for you, it will tend to shrink after it cooks. I don't usually use up the trotter. I keep some of the bony parts without any meat and reserve it to make peanut or black bean soup on another occasion. I usually use the front trotters as they have less fat, but they also have less meat. So when I use it, I need about 2, as my family favours the lean parts more than the skin.
 1 packet of Bak Kut Teh Mix. I confess, this is the part which I cheat on. My mother used to go to the Chinese medicinal hall to get the shop keeper to do the mix, while my mother-in-law has her own mix of star anise, cinnamon bark and cloves. This is key that distinguishes flavor between one family to another. For me, I need something foolproof so I use the bak kut teh mix which you can get from the supermarket.
 Note that there are two types of mix, the peppery ones and the herbal ones, stick to the herbal ones. You can use any brand, I use Eu Yan Sang as they come in sealed packs and can be kept for a long time. (I have a friend who always gets a few boxes at the Airport to bring abroad when she comes back to visit in Singapore. A box contains 12 pkts.)
 2 -3 clusters of garlic. You must add this if you want an authetic taste. Don't worry, it loses its sharpness after braising. Wash the garlic and crush them slightly with a back of a cleaver or mallet. (Leave the skin so that the garlic will not break up too much when cooking. Crushing allows the garlic flavour to infuse the braise.)
 8 tbsps of Dark Soya Sauce. Less if you like your trotters a little lighter, more if you like it darker. I favour the dark soya sauce with red dates, as it is really thick and not so salty. Furthermore, the red dates add sweet taste to it. With this there is no need to fry the caramel or add sugar which some of the traditional recipes ask for.
 Water to Cover Pot. Sea Salt about 1 teaspoon.
Procedure:
 Boil a kettle of water. Blanch the pig's trotters in the boiling water to remove the blood on the surface, which will leave scum when you braise. Soak it in the hot water for a short while, meantime you can assemble the pot.

Put in the trotters. Put the trotters on top of the above mixture, prevents the herb bag, the garlic and mushroom from floating around. Drizzle in the soya sauce. (Some people prefer to drizzle and coat the trotters with the sauce before putting in....it doesn't quite matter for me.)
 Add in sufficient water (if you want it to be faster, hot water) to cover the trotters. Put on the lid, turn the setting to "Auto" . And braise until the trotters soften (till the meat detaches easily from the bone). Add sea salt to taste and mix well burning turning off the braise. And it is ready for serving.
Comments:
You can do the same in a pot (preferably claypot), set it to a boil then a simmer till the bone detaches.
I do this for my lunch at work the next day, so I usually set this around 9 pm and it is ready by 5 am in the morning when I wake up.
If cooking for dinner on weekends, I do this at in the morning around 11 am and it should be ready for dinner in the evening.
Remember to reserve the stew the next day, you can boil the mixture and add in hard-boiled eggs, beancurd, beanskin, intestines, or chicken wings for a second meal.
Subscribe to:
Posts (Atom)